|
<< Click to Display Table of Contents >> Web Server - Port 80 Setup |
  
|
|
<< Click to Display Table of Contents >> Web Server - Port 80 Setup |
|
Please read through the Web Server section to learn more about SpecView's Web Server features.
Follow the steps below to allow incoming connections on the PC's Port 80 for SpecView's Web Server.
| 1. | Verify with the IT department that Port 80 is open and available to be utilized. |
Port 80 is the standard port for web pages (http) and it may conflict with another web server running on the same computer – or may make it difficult to access this Web Server from outside via the Internet.
| 2. | Open Windows Control Panel > Network and Internet > Network and Sharing Center. |
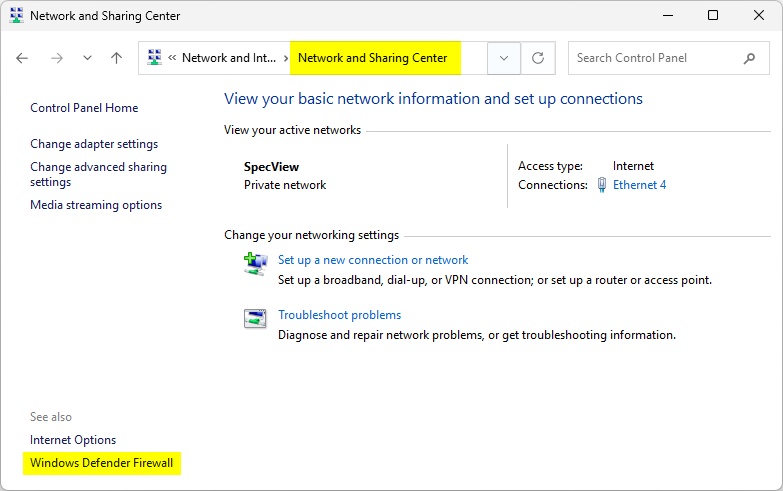
| 3. | Click on Windows Defender Firewall. |
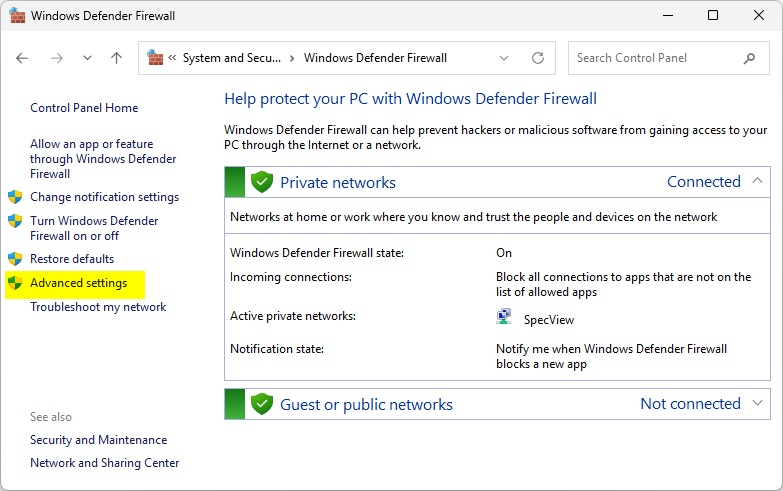
| 4. | Click on Advanced settings. This will open the Windows Defender Firewall with Advanced Security box. |
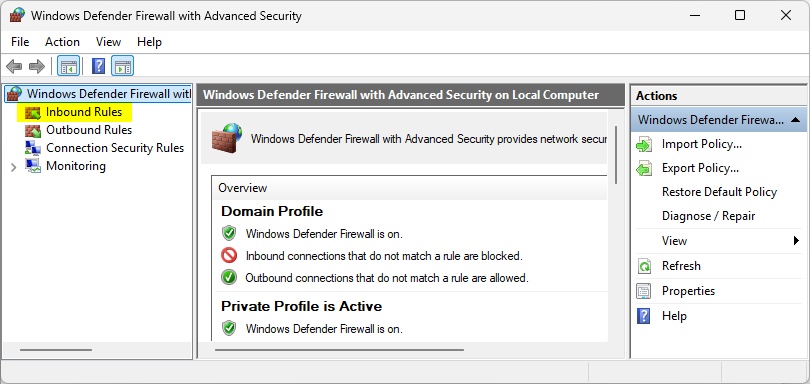
| 5. | Click on Inbound Rules. |
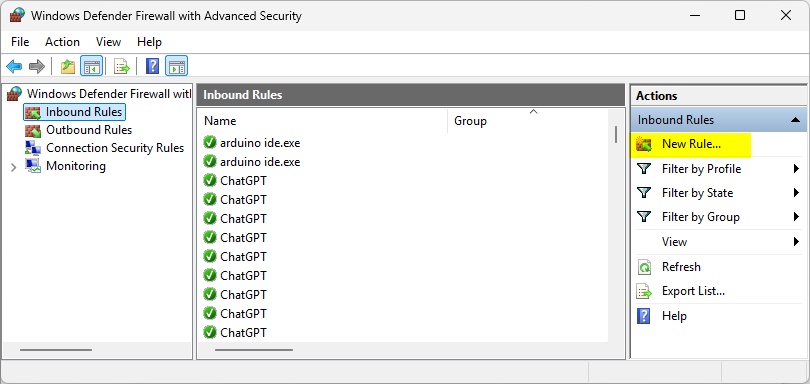
| 6. | Click on New Rule. This will open the New Inbound Rule Wizard. |
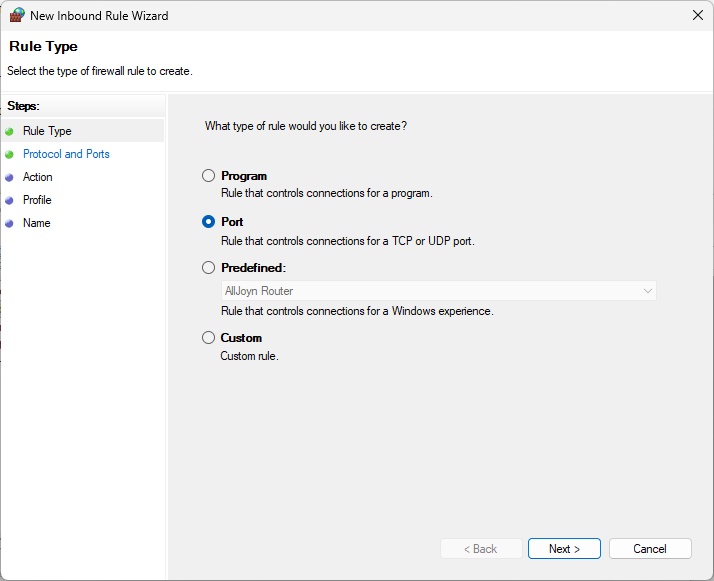
| 7. | Click on Port and then click Next. |
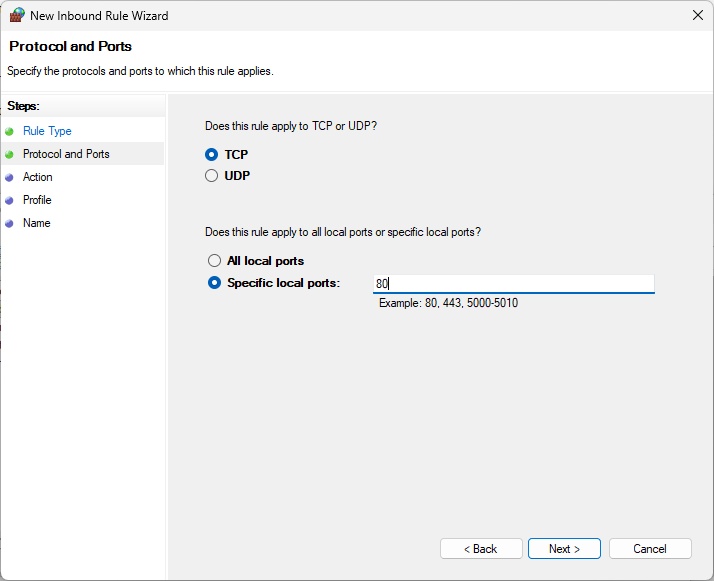
| 8. | Click on Specific local ports, enter 80 into the field, and click Next. |
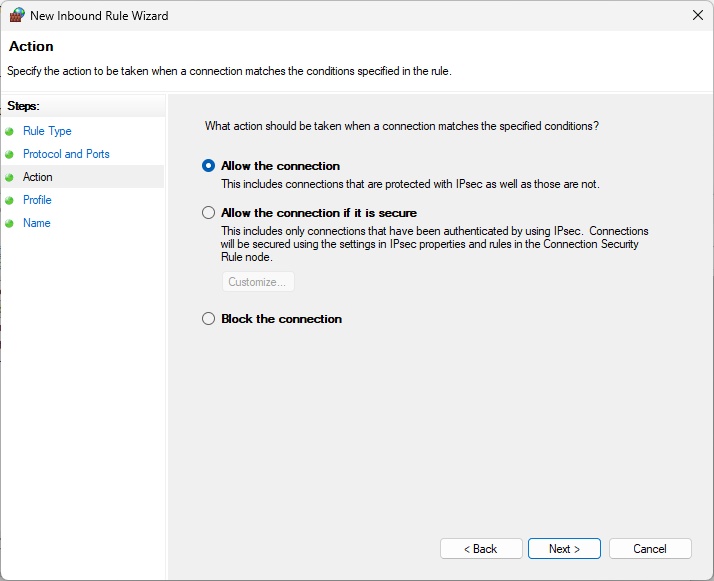
| 9. | Click Allow the connection and click Next. |
The user should confirm with their IT department regarding when this rule should apply.
It is recommended to start with enabling all domain, private, and public, connections.
The user can edit this setting later once the Web Server is operational.
Click on Next to continue.
| 10. | Provide an appropriate name for the new Inbound Rule and click Finish. |
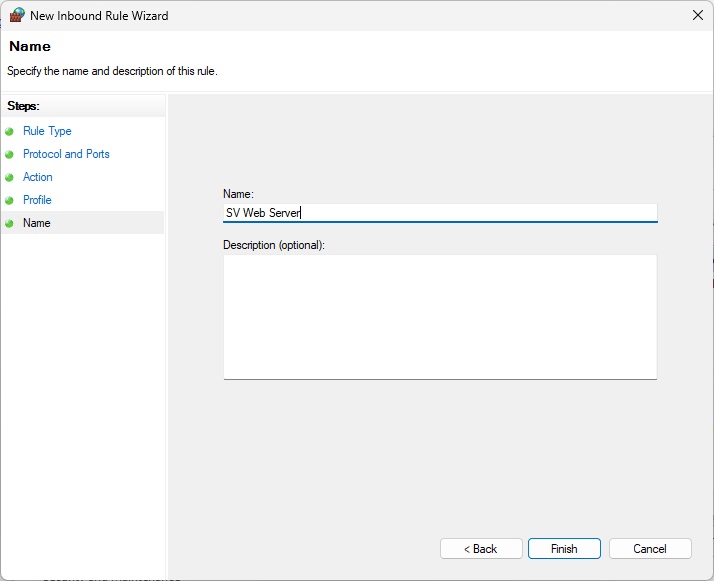
The PC will now be able to accept incoming Web Server connections on Port 80 for SpecView.