|
<< Click to Display Table of Contents >> Startup Sequence |
  
|
|
<< Click to Display Table of Contents >> Startup Sequence |
|
The language to be used by SpecView is selectable at startup. The Do not show checkbox is checked by default as normally one language is used throughout.
To reset the Do not show checkboxes choose Preferences from the File menu and click the Settings tab.

SpecView starts much quicker than previous versions, especially opening projects containing ActiveX controls.
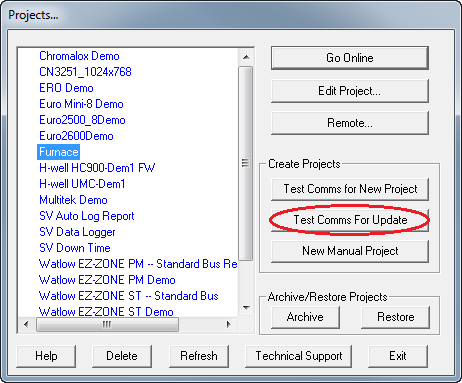
SpecView's splash-screen has been simplified to make it more straightforward for the the user, so that the more complex Configurations Found box is not the first box seen at startup. The Configurations Found box is called Projects and can be accessed by clicking the Select/Create Project button.
Holding the SHIFT key down while clicking the Start button will go directly into Edit Mode with Live Features Offline (this is the same as SpecView Version 2.5).
Whereas, holding the CTRL key down while clicking the Start button will go directly into Edit Mode with all Online Features enabled.
This also applies to the Go Online button on the Projects box.
The splash-screen graphic can be an animated graphic (GIF) file.

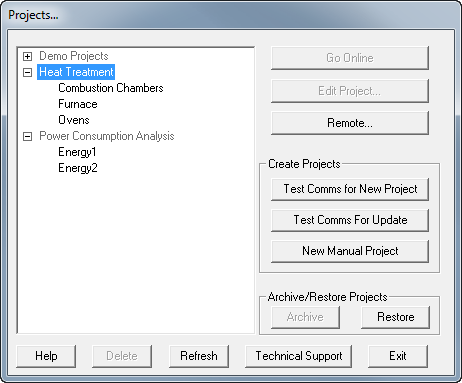
Projects can be grouped together under a folder structure. This means project folders within a sub-folder will be listed in the Projects box and can be expanded by clicking the '+'.
This helps to keep projects organized in logical groups in the project list.
When doing a Restore, the folder to be used can be specified.
The Demo projects are now in their own folder.
To group projects together use Windows Explorer to create a new empty folder with the name of the group and move the related projects into that folder. When SpecView next runs they will be shown in their groups.
Auto Detection
As instruments are auto-detected there is now a prompt for the instrument's name to allow instruments to be given meaningful names from the outset, rather than having to remember to go into the Variables List and rename them. This is important because if Online Features are enabled, logging will commence immediately the instrument is defined and the data will be logged under an incorrect name.
The Test Comms for Update button can be used to auto-detect instruments and add them to an existing project.