|
<< Click to Display Table of Contents >> Starting SpecView |
  
|
|
<< Click to Display Table of Contents >> Starting SpecView |
|
Double-Click the SpecView Icon  to start the program, or run from All Programs on the Start menu.
If you do not have a SpecView copy protection key (called a dongle) connected then it will only Demo or Remote will offered:
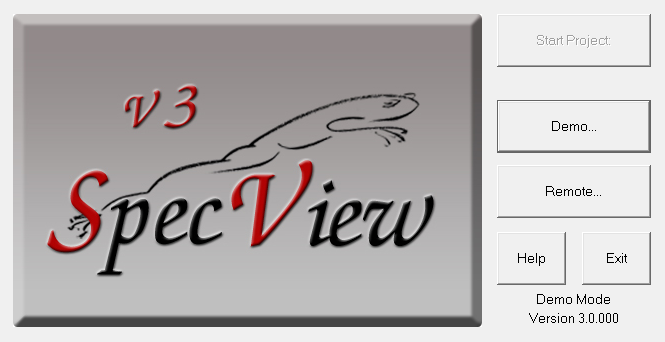
Click the Demo button, SpecView will be fully functional in Demo mode but a timer limits communication with the instruments to ten minutes. This timer is reset each time Runtime Mode is entered.
When SpecView starts up it displays a splash screen containing the logo and the Copyright.

Either click Start to go directly to Runtime, or click the Select/Create Project button to display the Projects box (shown below).
Holding the SHIFT-key down while clicking Start will go into Edit Mode (Online). Holding the CTRL-key down goes into Edit Mode (offline).
|
The Refresh button on this box allows for the list to be refreshed to take into account any new projects that might have been manually created after SpecView has been started.
The Archive/Restore buttons allow you to Archive or Restore entire projects. |
If you have an existing Project, which may be a demo project installed as part of SpecView, or previously Restored, which you intend to run, then select it and click the Go Online button, and continue from Runtime Mode - Using SpecView
Note that it is possible to do a shortcut directly into Edit Mode (online) by holding the SHIFT-key while clicking the Go Online button. Holding the CTRL-key down goes into Edit Mode (offline).
Alternatively, clicking either Test Comms for New Project or New Manual Project will display the Input Required box:
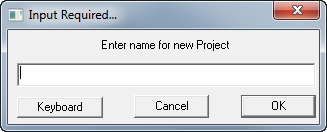
Enter a name for the project. SpecView will create a sub-folder with this name in the SpecView folder (which is normally C:\SV3), the name you enter should follow the Windows file naming rules and should not be too long.
Remember this name. This folder will be where all your log files and project files will be stored. Log Reports will also be stored here unless another folder is specified.
Then continue from Instrument Definition/Detection
Note that is is not possible for SpecView to be run as a Windows service.
But it is possible for SpecView to be run automatically when the computer starts.
As of SpecView 3.1.275, it is possible to disable the splash-screen buttons.
This can be useful to prevent users from connecting to an incorrect SpecView Local as a Remote.
Also, it prevents users from incorrectly entering Demo Mode when attempting to connect to a Local.
| 1. | Open the SV3 folder. |
| o | By default, it is in the C drive (Local disk). If SpecView was installed to another drive, then the folder will be found in that drive. For more information contact your IT department or the SpecView representative that set up SpecView. |
| 2. | Open the SV3.INI file. The file can be opened in a text editor such as Notepad. |
| 3. | Find the [Settings] section in the file and enter the following commands under the section. |
ShowSplashDemoButton=N
ShowSplashRemoteButton=N
ShowSplashTopButton=Y
Setting the values to "Y", would enable buttons again. By default, the buttons are enabled.
Setting the values to "N", disables the buttons.
It is strongly advised not to disable all the buttons.
Otherwise, users will not be able to navigate into a project or connect to a Local as a Remote.
| o | ShowSplahDemoButton is to enable or disable the Demo button on the splash-screen that appears when users run SpecView without a license (Demo Mode). |
| o | ShowSplashRemotButton is to enable or disable the Remote button that allows users to utilize SpecView’s Multi-User System. |
| o | ShowSplashTopButton is to enable or disable the Start button that allows users to enter a previously opened project directly. |
