|
<< Click to Display Table of Contents >> Quick Start - Add a variable to the GDW |
  
|
|
<< Click to Display Table of Contents >> Quick Start - Add a variable to the GDW |
|
To add a variable to the GDW (Graphical Display Window) or GD3 click the Variables List tool ![]() to display a list of the instruments that SpecView has detected.
to display a list of the instruments that SpecView has detected.

The name SV also appears in the list as this represents a list of pre-defined variables that are associated with SpecView.
There is also a list of User Variables.
Click the ![]() symbol next to an instrument name to see all the parameters.
symbol next to an instrument name to see all the parameters.
Click and drag a parameter, or multi-select and drag and spread out a number of parameters out onto the GDW.
The name of the variable will also be displayed on the GDW together with the value of the variable itself.
This is assuming that Include Instrument and/or Parameter Name is selected on the Variable List's Options Menu:

Note: If the value of the variable(s) are shown as N/R then first go to the Online Features menu and check it is Online then if unresolved go to Troubleshooting.
When the name of the variable and its value are initially put onto the GDW, they are put out as two separate items. In order to move them both together (as a pair) to a different position on the screen they will need to be grouped together.
To do this use the Group tool 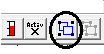 (or press G) which will group them together:
![]()
Use the mouse to drag into position on the GDW.
To position on the screen exactly use the cursor keys to nudge by one pixel.
Dragging an object on the screen using the mouse, or holding the SHIFT key down while using the cursor keys, will make the object jump by one grid increment, whichever grid size is active at the time. The position of the object relative to the grid will be preserved.
The grid sizes are specified using Set Grid Sizes on the View menu and the grid size to be used is selected by choosing Toggle Grid Lines from the View menu or pressing CTRL-G to cycle through them.
To align an object with the grid use Object->Align->Realign To Grid.
Remember to Ungroup them afterwards using ![]() (or press U).
(or press U).
To change the name of a variable, it is best to do this from the Variables List BEFORE putting the variable onto the GDW. This is done by right-clicking and choosing Properties from the popup menu.
More information on variables see the Variables List.
In order to change, for example, the font or color of a variable or its name, use the Ungroup tool ![]() (or press U) to ungroup the variable and its name, then double-click the name to display the Text Attributes box:
(or press U) to ungroup the variable and its name, then double-click the name to display the Text Attributes box:

Click the Choose Font button to choose and alternative font or font color.
Note: To change the default text font use the Text Font menu command from the Object menu.
Click the Save tool ![]() and then Save to save this GDW again.
and then Save to save this GDW again.
Click the Runtime tool  to enter Runtime Mode.
Alarms List box may be displayed if there is an alarm active on the instrument, close it by clicking the Close button.
NOTE: The obvious differences between Edit Mode and Runtime Mode are that Edit Mode displays a grid across the screen (GDW). Although it is possible to disable the grid (Using Toggle Grid Lines from the View menu) this is not recommended as the grid helps with aligning items when positioning them. There are also significant differences between the contents of the menus in the two modes. Edit Mode also has a toolbar. It is best to use Edit Mode only when setting up SpecView or changing screen layouts. and go into Runtime Mode once this is done. this prevents any accidental changes being made. Edit mode can also be Online depending on the settings on the Online Features Menu.
For the next step read: Draw a Trend Chart